Collaborate Better with Postman Version Control: Workshop Recap Part 2
We recently completed an online workshop series. In part 1, we went over how you can import a schema, save example responses, create descriptions, share your collection with others, create workspaces, comment on collections, and quickly create documentation.
In part 2 of the workshop series recap, we’ll break down version control using the Postman fork and merge feature. In Postman, you can create forks, track and verify changes, be notified of and resolve conflicts, and merge changes. The fork and merge capability simplifies version control so you can collaborate and work on different versions of your Postman Collections simultaneously. To learn how to get started with the fork and merge feature, follow along with this step by step blog or watch the recording.
Creating a fork
A fork allows you to create a copy of a collection that is linked to a parent collection so teams can work in parallel on the same collection. This makes it easy for teams to make changes and test them without risking the base collection.
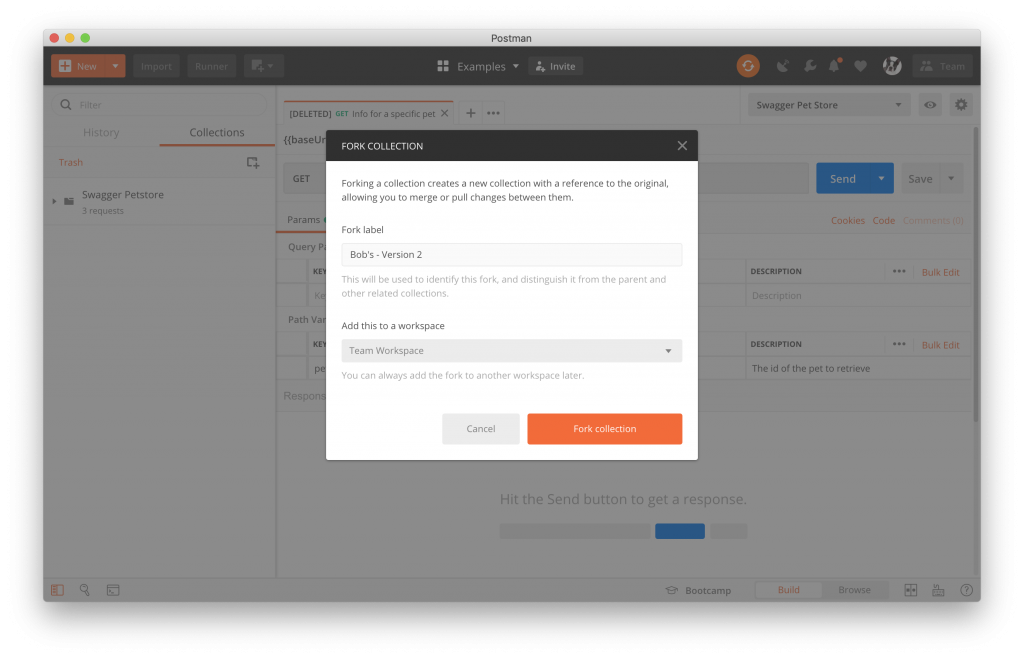
1) Go to your collection and click the ellipsis (…) and click Create a fork.
You’ll see a window pop up in which you can name your fork and choose a workspace to work in.
Workspaces help you control permissions. You can create the fork in a personal workspace so no one else can access or change the collection, or create the fork in a team workspace to allow for collaboration on the forked collection.
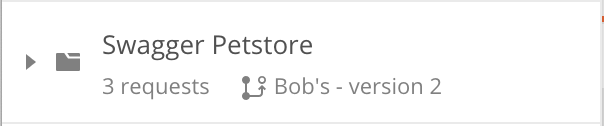
It’s easy to keep track of your forked collections. In the picture below, you’ll see that the forked collection will have the fork symbol and name underneath the collection title.
To make keeping track of your forked collections, it’s always a good idea to create a standard naming practice.
2) Make your changes in the forked collection and save.
You can add new requests, tests, monitors, mock servers, etc. to your forked collection and hit Save.
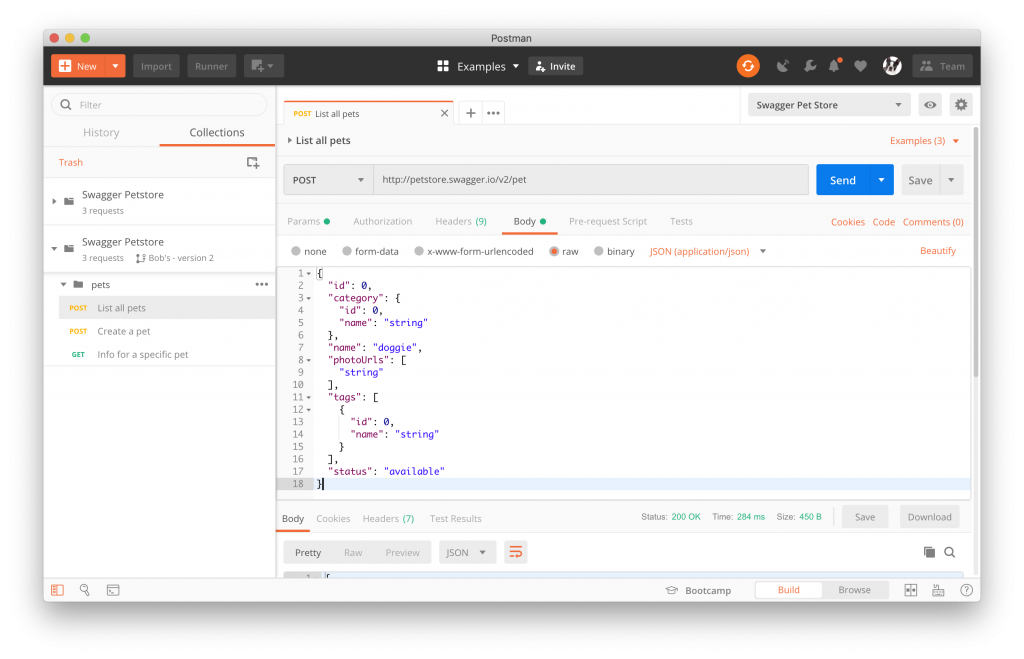
In this example, we’ll make a small change, but you can change anything you want in your collection. In the Swagger Petstore in the GET List all pets request
- Change the request to: POST
- Change the request URL to: http://petstore.swagger.io/v2/pet
- In the Body, change the content type to: application/JSON
- In the Body, paste the following code:
{
  "id": 0,
  "category": {
    "id": 0,
    "name": "string"
  },
  "name": "doggie",
  "photoUrls": [
    "string"
  ],
  "tags": [
    {
      "id": 0,
      "name": "string"
    }
  ],
  "status": "available"
}- Press Save.
3) Test your collection to ensure the changes are working as expected.
Now that you’ve created a fork, you can test it out before merging your collection. You’ll want to ensure that you’ve thoroughly tested all of your changes before you merge any updates to your parent collection.
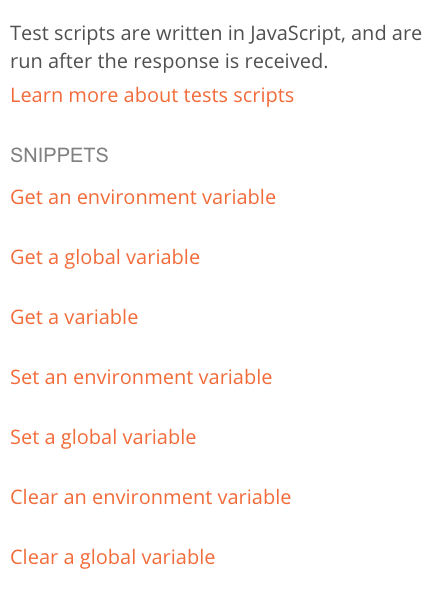
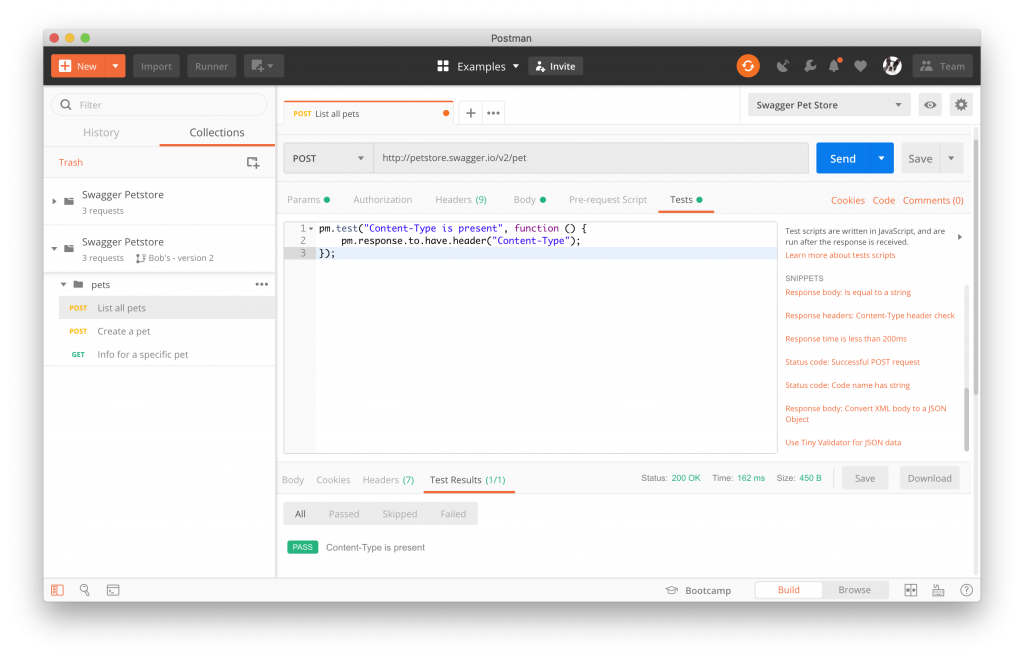
In the POST List all pets request, go to the Tests tab and you’ll see that Postman provides JavaScript test snippets. You can write your own test snippets too, but these commonly-used snippets are handy and save time.
In the code snippet list, select Response headers: Content-Type header check, and send your request again.
Under Test Results, you’ll see whether or not your test passed or failed.
Once you’re satisfied that your collection is working as expected with the new changes, you’re ready to merge to your parent collection.
Merging collections
When you merge collections, the changes you’ve made to your forked collection will be transferred to the parent collection.
1) Go to your forked collection and click the ellipsis (…) and click Merge changes.
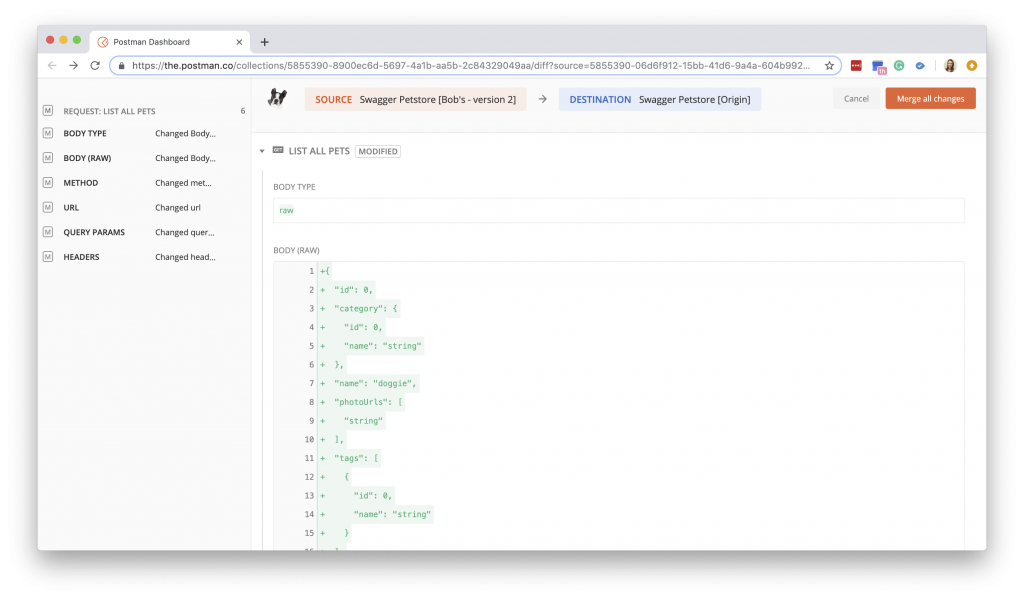
Your dashboard will pop up with a list of all the changes you have made.
2) Review changes and click Merge all changes.
Before you merge to the parent collection, you’ll want to make sure that all of your changes are listed and appear as expected.
In the new window, you can see an index of all the changes you’ve made in detail.
Note: you can also view changes in the in-app changelog when you go to your collection, press the arrow, and select the Changelog Tab.
3) Select your preferred merge method and click Merge.
Note: We use the terms “source” and “destination” to describe the 2 collections. The source refers to the collection with the new changes. The destination refers to the collection that will be updated with the new changes.
Postman gives you 3 options to choose from when merging with your destination.
- Merge changes – The destination (in this case, the parent collection) will be updated with the changes from the source (in this case, the forked collection) and the forked collection will remain as it is.
- Merge changes and update source – Both the source and destination will be updated (they’ll be identical).
- Merge changes and delete source – The destination (in this case parent collection) will be updated and the source (the forked collection) will be deleted.
For this particular example, I chose Merge changes and update source to ensure that both collections are up-to-date. Ensuring that your changes are merged and that you’re working off of the most up-to-date forked collection prevents conflicts (which I’ll address below).
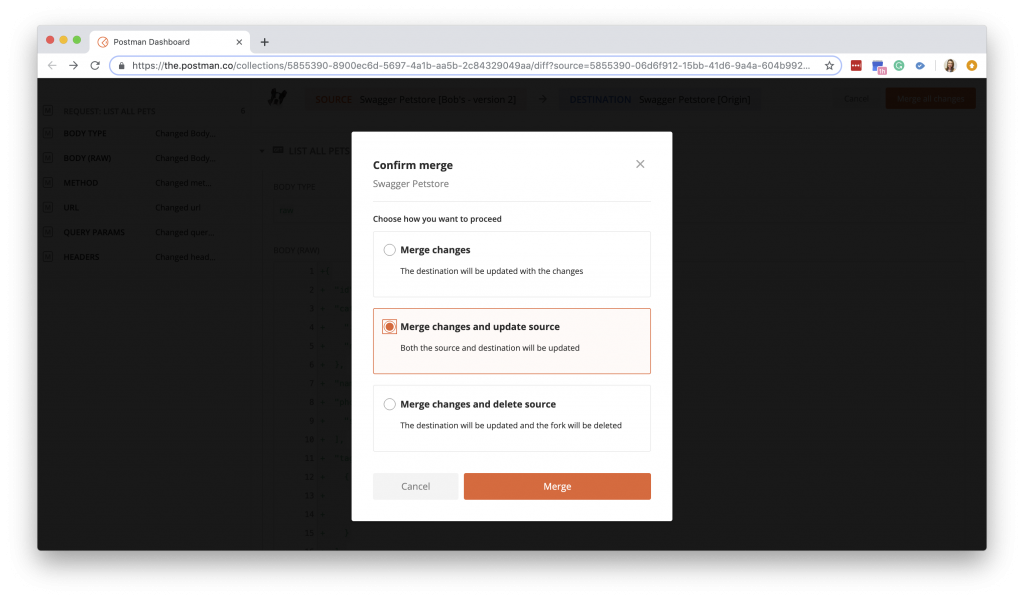
Now click Merge.
Your collections should update in the app, but if not, just press the refresh button.
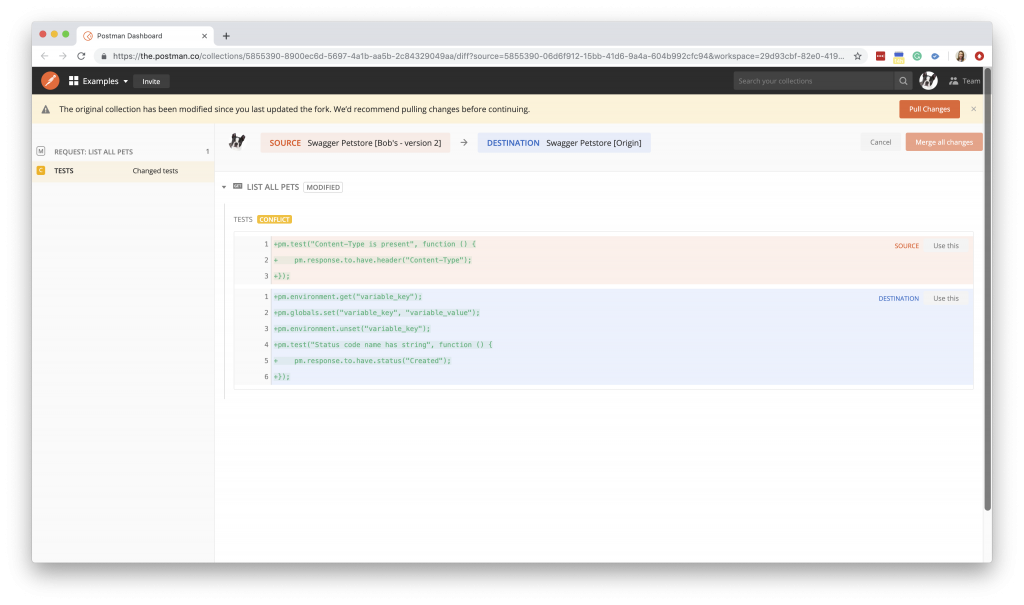
Resolving conflicts
When you’re working with a team, you may run into conflicts. For example, If multiple forked collections are being worked on simultaneously and a teammate updates the parent collection, then your collection and the parent collection will be out of sync.
When you attempt to merge a collection to an out-of-sync parent collection, Postman will notify you.
Postman offers a couple of ways for you to resolve conflicts. You can pull changes or choose which state to merge.
Pull Changes
In order to get your forked collection in sync with the parent collection, you can click Pull Changes. This will take everything that has been updated in the parent collection and update the forked collection. This option will delete any work that has not yet been merged to the parent collection.
Merge and Resolve
In your dashboard, you’ll also be able to view the differences in the source and destination. This allows you to select which one to keep and merge into the parent.
Avoiding Conflicts in Parallel Development
When multiple people are working on a collection, you’ll want to ensure you’re communicating when any changes need to be merged via comments. This makes it easier to delegate tasks, quickly identify issues, and avoid potential conflicts before they occur.
Another good practice to keep in mind is to always start working on an updated fork. This will prevent your collection from getting out of sync with the parent collection.
Try out the merge and fork feature with your team! Read our docs to learn even more and stay tuned for part 3 of our workshop recap!
What do you think about this topic? Tell us in a comment below.